Showing posts with label DIY. Show all posts

Thursday, June 27, 2013

No Soliciting

My summer vacation from teaching is supposed to be a time of well deserved R&R. The majority of my mornings and early afternoons have been interrupted with my doorbell ringing or knocking at my door. The dogs go nuts and chaos begins then I'm faced with a complete stranger politely telling them I am not interested in whatever shenanigans they are presenting. Lets see if my new sign works! Fingers crossed!!
First I searched Pinterest for some ideas on signs. Once I found the right wording, I used Polyvore to create the placement and size of my font. From there I saved my photo and printed directly on some burlap cloth. This took some practice but the easiest way was to iron my piece of fabric flat, then tape it onto a paper that would feed directly into my printer.

Next I used a canvas to fit my fabric on. No glue or adhesive.
I used some scrapbook hardware to attach the fabric to the canvas. If you use the same method, be sure to make holes in the canvas before trying to attach brads. I just used a thick nail and hammered it through.

I trimmed the fabric and traced over the smaller font with a fine lined sharpie. Then attached some twine to hang.

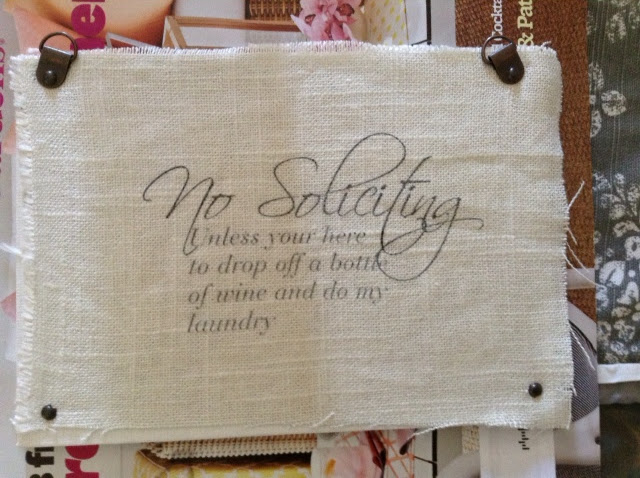
My finished product! It hung perfecty over my wreath...that was later brought to my attention had a spelling error. Son of a gun!!

My sad attempt to bring back some of my dignity (not the best thing to misspell when you're an English teacher) lol

Saturday, October 20, 2012

Under The Sea Party

Home birthday parties are the best! Enjoy the snapshot of my baby girl's 6th birthday party.

Saturday, March 17, 2012

Kitchen Update!! Island

Here's the latest in our kitchen makeover!


We've added a kitchen island!

What still needs to be done to the island?
-Stain butcher block countertop to a dark brown.
-Add doors & drawers (not pictured)

We purchased the island at Ikea. It's three base cabinets (two 18" and one 24") and a butcher block counter top. It was too pricey for us to buy all at once so we opted to buy the "bones" of it and we will go back later for the smaller pieces. As of right now, it functions just perfect!

I already had bar stool seating from my kitchen nook at my old place (purchased at Bed, Bath & Beyond).

What's next?
1.Granite Countertops (installed in less than 2 weeks)
2.Removing that 60's tile backsplash and replacing with a modern backsplash
3.Wall color. Planning to go with "High Noon" which is a blue color
4.Dark hardwood floors
5.Center Island
6.Faux ceiling beams (dark wood)
7.Remove wall (photo below. Those papers hanging are my inspiration to keep moving ahead with this loooooong project)
8.Cabinet molding
9.Crown molding
10.New windows!